This tutorial will teach you how to create cards for a Hearthstone-style game. We used this technique to make our latest 54-card game, In Dreams. It makes iterating on the card design and updating art & text a snap.
Making all but the simplest card games is a huge task. Adobe InDesign has feature called Data Merge that can make managing the design of a deck of any number of cards much easier.
With this template, easily add new cards to your game by simply adding new rows to a spreadsheet.
Note: This tutorial is an extension of what I learned from Daniel Solis; you can read more about his method on BGG, watch his detailed video series on this topic on Skillshare, or his excellent Card at Work playlist on YouTube.
If you don’t have InDesign
Some similar card-building alternatives that I’ve discovered since writing this post:
- Inkscape plus the Countersheets extension — free, open source
- Figma plus Google Sheets — free, web-based (video tutorial 1, video tutorial 2)
- nanDECK — free, Windows only (Linux & Mac with WINE – they’re also working on an online version)
- Cocktail — free, Windows only (video tutorial)
- Multideck — paid, Mac only
- Component Studio — paid subscription, web-based. Hooks directly into The Game Crafter, and does more components than just cards.
- Card Creator — paid, Windows only.
- Affinity Publisher — paid, Win/Mac. Full page layout tool, similar to InDesign but way cheaper. See their tutorial on data merge here.
Here’s how it works:
- Create the card artwork in Illustrator.
- Lay out a card template in InDesign.
- Make a spreadsheet. 1 row = 1 card.
- Import the CSV of your spreadsheet into InDesign.
- Connect each element in your template to a column in your spreadsheet.
- Create custom card backs.
- Generate all the cards and export as PDF.
- Lay out the cards for print.
- Lay out the cards for Tabletop Simulator.
1. Create the card artwork
You don’t have to have finished artwork to get started, but I’ve found that it’s very helpful to do a basic mockup of your card layout in Illustrator before doing anything else. This will help you figure out exactly which elements need to be on each card type, approximately how big they should be, and where on the card they live.
NOTE: In the sample project, I’ve included card templates for both Illustrator and Photoshop; which one you use is a matter of personal preference. The instructions below are for Illustrator. If you use Photoshop, export all your assets as PNG files using Adobe Generator.
Open Adobe Illustrator and create a new document:
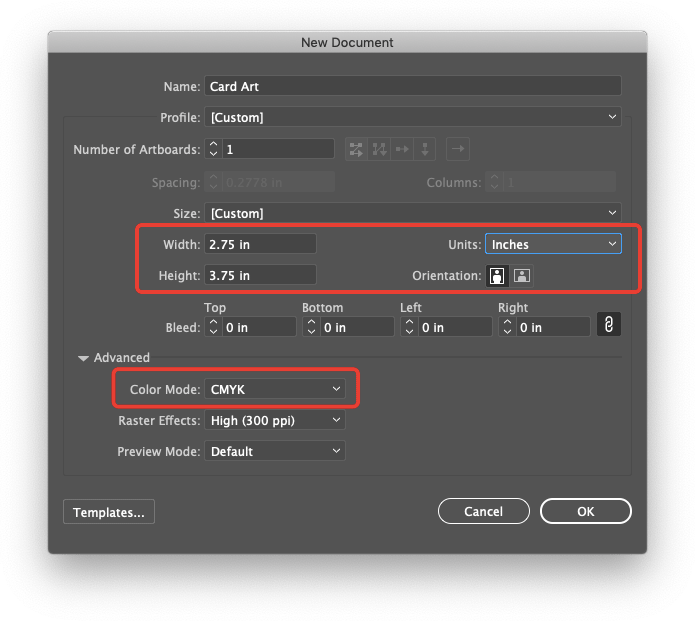
Standard playing cards are 2.5″ x 3.5″. Add 1/8″ bleed around all four edges of your card, making the total size 2.75″ x 3.75″.
If you are planning on doing a printed version of your game, set the Color Mode to CMYK. If you are only doing a digital version, set the Color Mode to RGB.
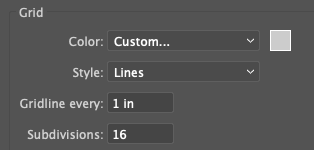
In the Preferences, set the Grid to have a Gridline every 1″, with Subdivisions set to 16:
Turn on grid snapping by selecting View > Snap to Grid.
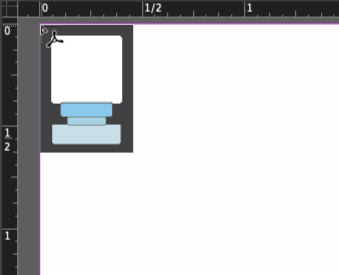
Zoom in on the top-left corner of the document and drag off some guides in these positions (hold Shift while creating the guides so they snap to the grid):
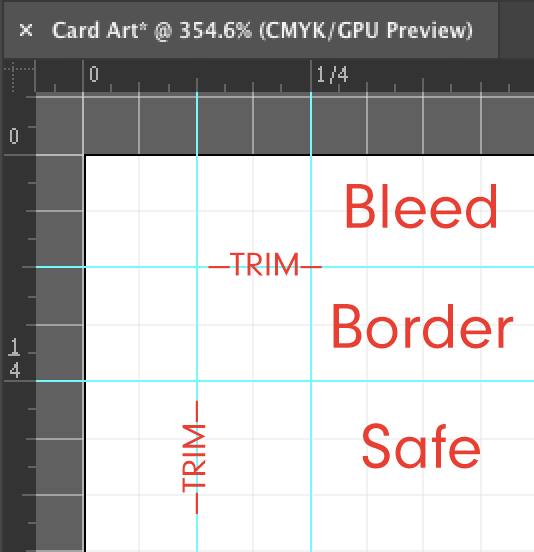
The outermost 1/8″ is your bleed, and should be an extension of your border. This will get cut off after it’s printed.
The next 1/8″ is your border. There shouldn’t be any information critical to your game here, but some games use borders with different colours to differentiate card types.
The rest of the document is your safe zone, where all of your card art will be.
Don’t forget to zoom in on the bottom-right corner and create the same guides there.
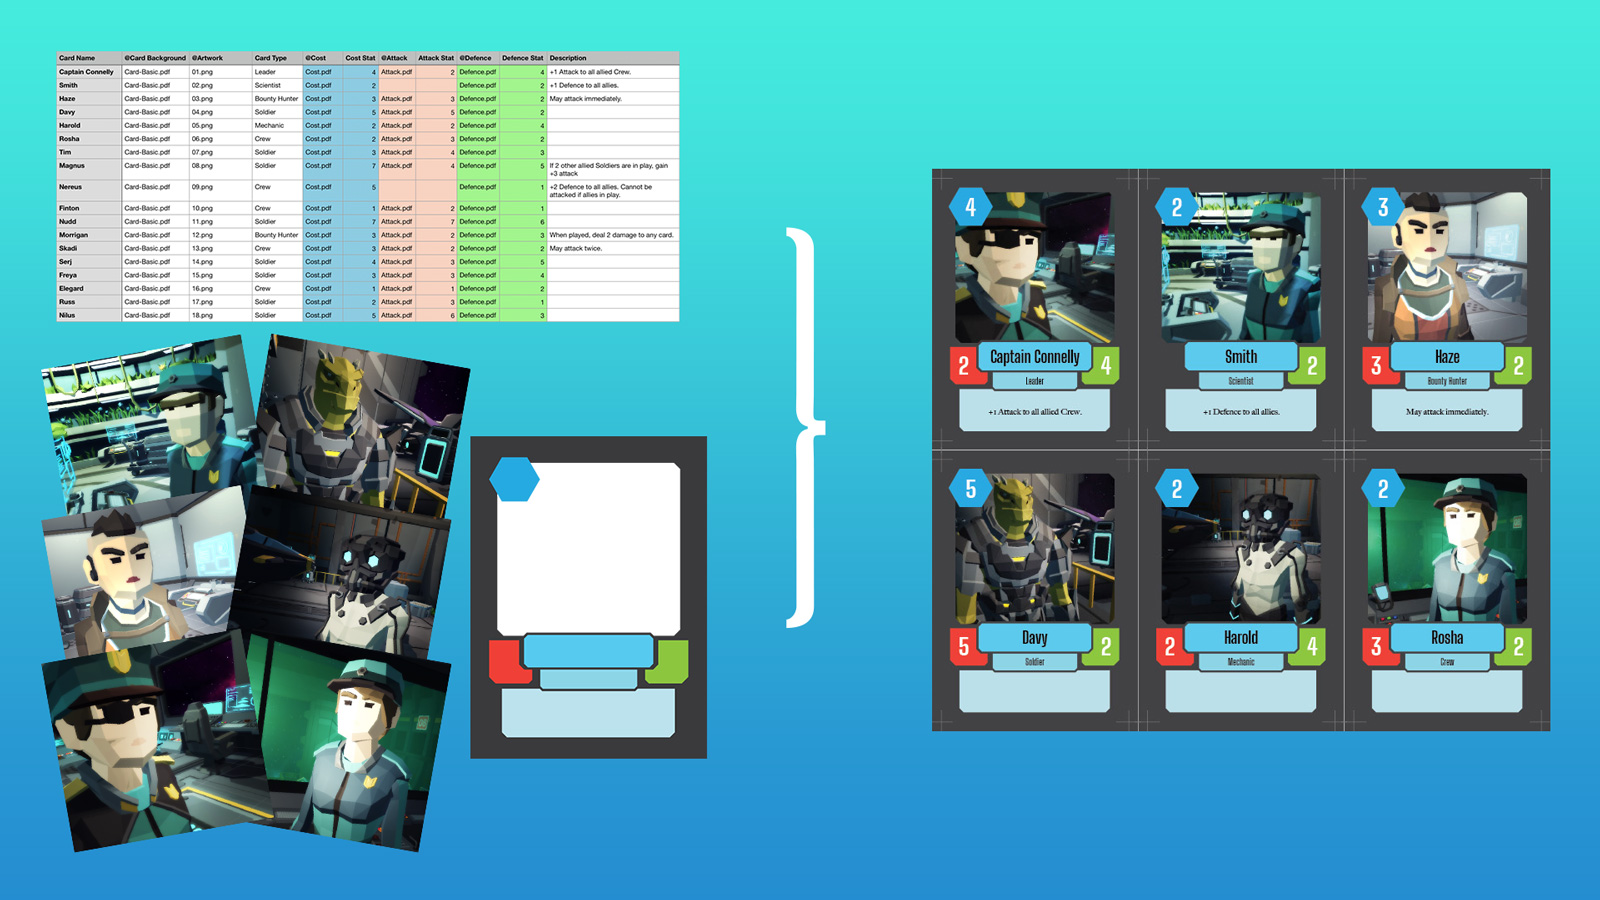
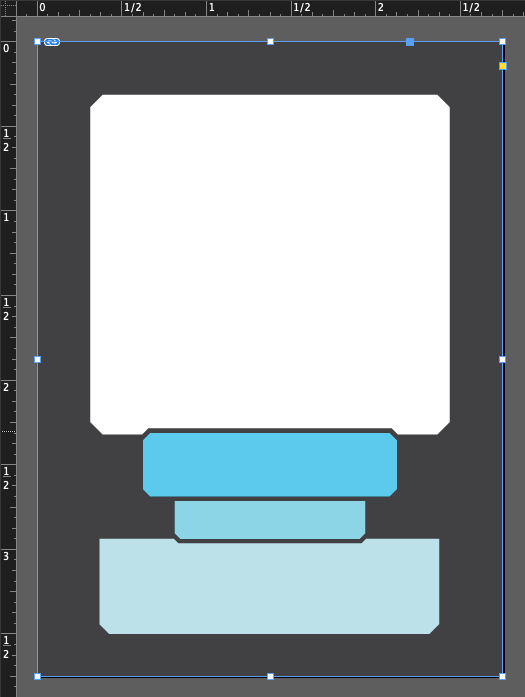
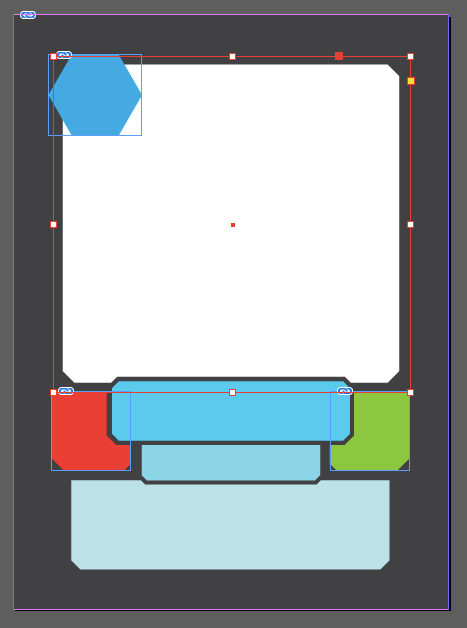
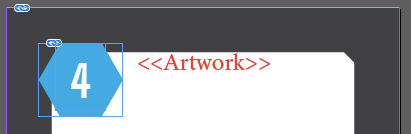
For the purposes of this tutorial, I’ve made a very basic card layout. Note that the area in the middle is transparent. The artwork for the card will go here, on a layer behind everything else.
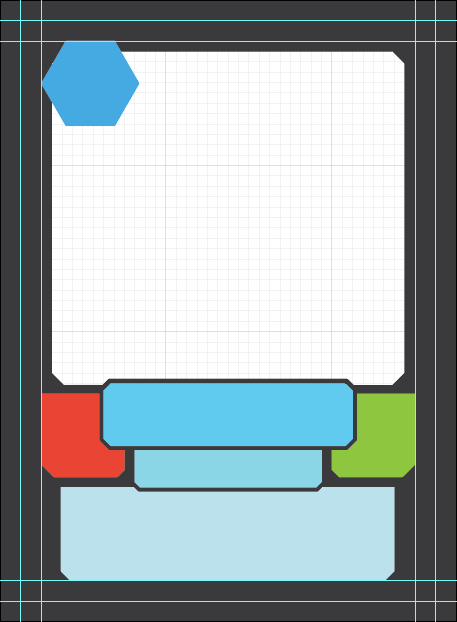
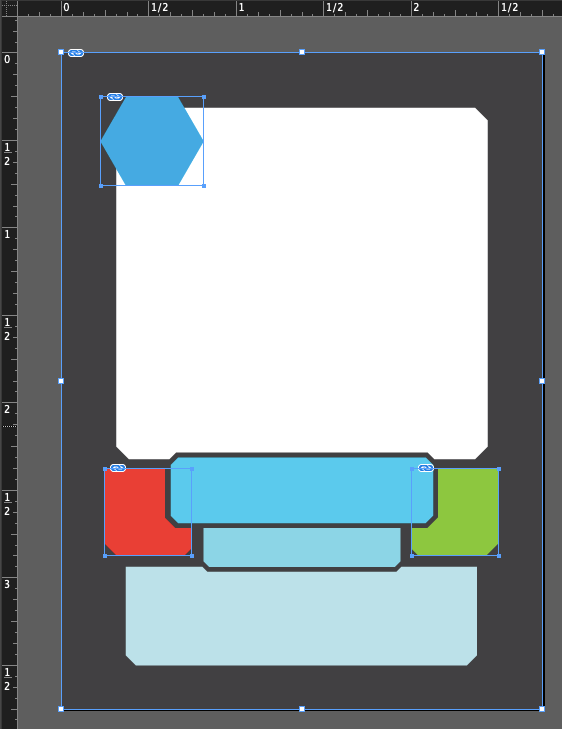
Aside from the artwork, we’ve got a place for the card’s cost (blue hexagon), the card’s attack (red) and defence (green), the card’s title (top blue rectangle), the card’s type (middle blue rectangle) and the card’s description (bottom blue rectangle).
We could export this whole layout and save it as a single graphic, but that doesn’t give us much flexibility. What if we had cards in our game that don’t have a cost? Or don’t have an attack or defence stat? Let’s separate those objects so that later on, we can easily turn them on or off.
Using Artboards to export multiple graphics
Illustrator allows you to create multiple artboards in a single document. The Artboard Tool is in your toolbar, and looks like this:
When you click the Artboard Tool, the current artboard is highlighted. At the top of the screen, you’ll see a Name field. Change the name of this artboard to Card-Basic.
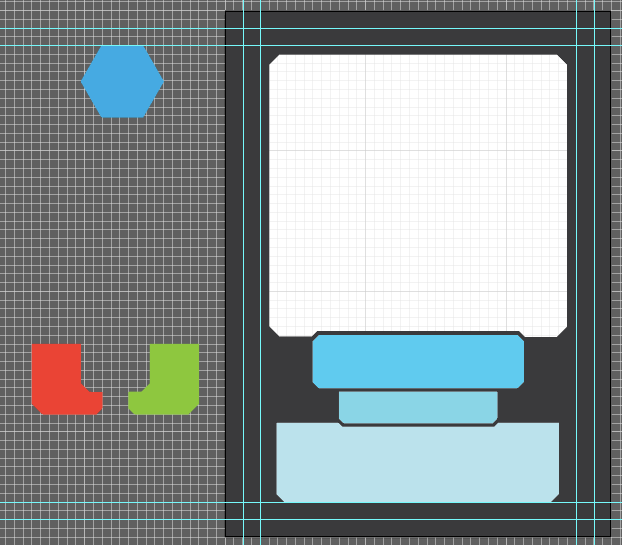
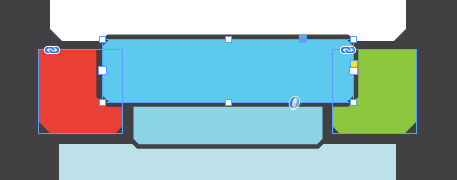
Switch back to the Selection Tool and drag the cost, attack, and defence shapes off to the side:
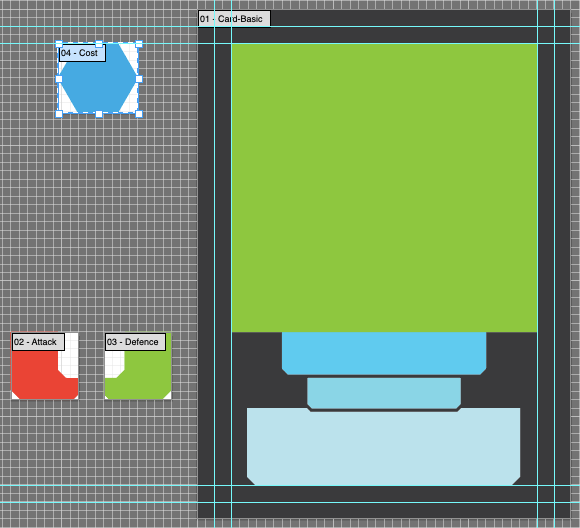
Switch back to the Artboard Tool and click once on the hexagon. It will automatically create a new artboard that is exactly the size of that shape. Change the name of that arboard to Cost.
Do the same for the attack and defence shapes, naming them Attack and Defence.
Export as PDF
You’re ready to export your graphics as PDF files! Select File > Export > Export for Screens.
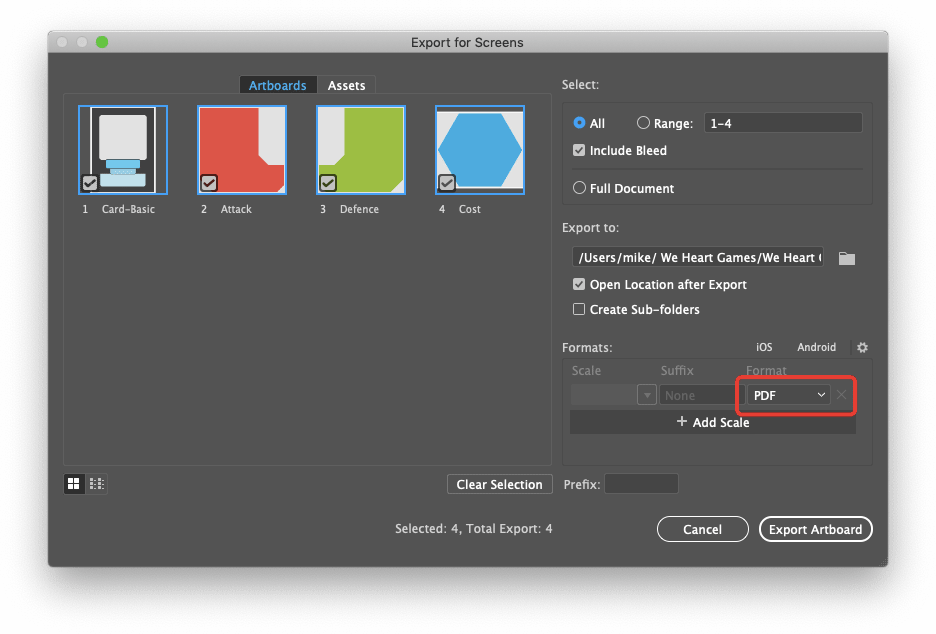
Under Export to: click the folder icon on the right to set your destination for the exported files. I recommend creating a folder called Links inside your project folder for your game. This will hold all your graphics for every card, as well as the spreadsheet for the InDesign Data Merge.
Make sure the exported file type is PDF, as shown in the screenshot above.
That’s good enough for now! Let’s move on to adding the data for each card to a spreadsheet…
2. Lay out a card template in InDesign
Open InDesign. Create a new document named Cards that’s the same size as the Illustrator file you just made: 2.75″ x 3.75″. Set the Margins and Bleed to zero.

Save the document into the same folder as your Links folder, so that the InDesign document and the Links folder are side by side.
Import the artwork you created for the card template by selecting File > Place… (or drag and drop your image onto the page). Start with Card-Basic.pdf. After you select the file you want to import, it will show a small preview of the file next to the cursor. Hover over the top-left corner of the page and click once to place the file:
This will import the image at its full size; it should now fill the page. Double-check the Transform panel to make sure the top-left corner is at 0,0.
Import the rest of the artwork, and position it over the background artwork. This will be easier if you turn on the same grid settings that you used in Illustrator.
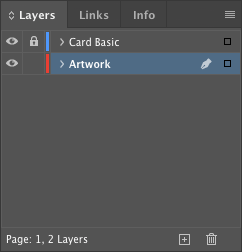
All of this artwork will appear on top of the card artwork that shows through the transparent area in the middle. Let’s head over to the Layers palette to make a separate layer for the card artwork, since it will be behind everything else, but we’ll still need to get at it later.
Double-click Layer 1 and change its name to Card Basic. Create a new layer, drag it below Card Basic, and name it Artwork. Then lock the Card Basic layer.
Use the Rectangle Tool to draw a box behind the open area in the middle, overlapping the edges a bit:
You’ll want to make a note of how big this box is, so that you can create your artwork at the exact right size, at 300 dpi. My box ended up being 2.25″ x 2.125″, so my images for the art will be 675 x 639 pixels. If you’re not sure how to get that number, the easiest way is to open Photoshop, create a new document, and set its dimensions to the measurements of your box, in inches, and set the dpi to 300.
There are some sample images for demonstration purposes included in the sample template files.
The final step in making this template is to make the required text boxes. In the Layers panel, lock the Artwork layer, and unlock and select the Card Basic layer.
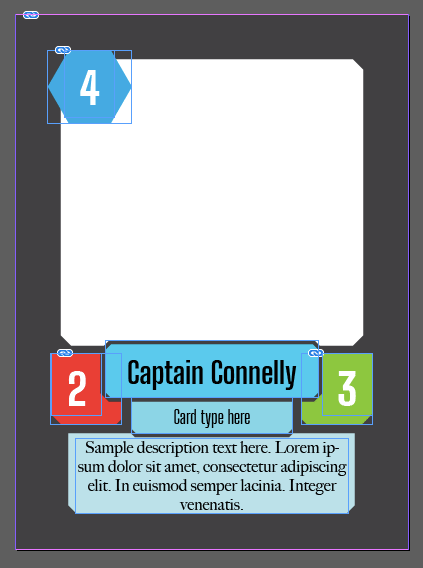
Use the Text tool to create a box over the blue rectangle for the title:
Type some sample text in there; the longest title in your spreadsheet is a good test for the font size. Align centre, choose a font, and set the size to be as big as will comfortably fit.
Select the text box with the Selection tool and select Object > Text Frame Options. Change the Vertical Justification > Align to Center.


Create and format text boxes for all the remaining spaces:
If you want to have inline icons in your text boxes, check out this written tutorial and this video, both by Daniel Solis.
Good enough for now; time get some real data into a spreadsheet.
3. Make a spreadsheet
You can use whatever spreadsheet software you want, as long as it can export to a CSV.
Each row of your spreadsheet counts as one card. Each column holds a different bit of information about the card.
Each cell of the spreadsheet can hold either text or a reference to an image. To make a column into an image reference, you must add the @ character before the name of the column.
Add these column headings to your spreadsheet:

- Card Name
- @Card Background
- @Artwork
- @Cost
- Cost Stat
- @Attack
- Attack Stat
- @Defence
- Defence Stat
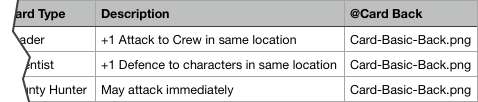
- Card Type
- Description
Fill in a few rows of the spreadsheet with whatever stats you like. Make sure the columns that start with @ have the name of an image. Feel free to colour-code the cells in your table, to make it easier to read:

Note that I left the @Attack and Attack Stat cells empty for the second card. This will show how optional fields work, later.
Export your spreadsheet as a CSV, and save it into the Links folder you created earlier.
IMPORTANT: All the images referenced by your spreadsheet must be in the same folder as the CSV.
4. Import the CSV into InDesign
You’ve got artwork, a template, and a spreadsheet; let’s start bringing them together!
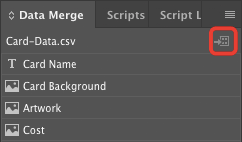
Switch to InDesign and select Window > Utilities > Data Merge to open the Data Merge panel.

Click the menu button at the top right, and choose Select Data Source… Find and select the CSV in your Links folder. The Data Merge panel now shows your column headings!
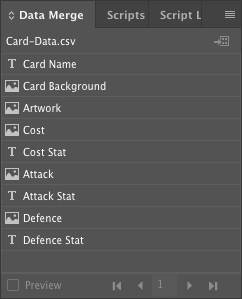
Notice how the text fields have a text icon and the image fields have an image icon. If your field has the wrong icon, check to see if you included the @ symbol at the beginning of the column name.
5. Connect the template to your spreadsheet
In the Layers panel, lock the Card Basic layer and unlock the Artwork layer. Using the Selection Tool, select the rectangle you created for the artwork. In the Data Merge panel, click the Artwork item. The box is now linked to that field of the spreadsheet:
It’s as simple as that. Select an element on the page, then click the matching item in the Data Merge panel.
Note: when you are linking text in this way, you need to highlight the text itself — rather than selecting the entire the text box — before clicking the relevant item in the Data Merge panel.
In the Layers panel, unlock the Card Basic layer and link the rest of the elements on the page. When finished, your page will look something like this:
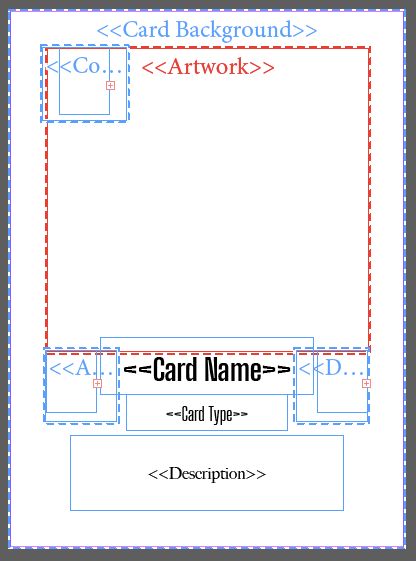
It’s not much to look at any more! That’s why it’s good to do all the layout with your actual artwork and text before hooking it up to the spreadsheet.
But here’s where the magic happens. You can preview your layout with all the data from your spreadsheet, without generating a new PDF, or even creating more pages in your document.
In the Data Merge panel, click the Preview checkbox:
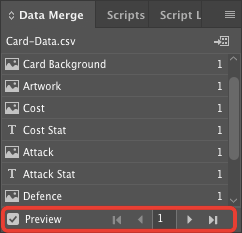
Your entire card layout is now shown, with all the data pulled from the spreadsheet! 🎉
Use the navigation buttons to move between the rows of your spreadsheet, previewing each card:
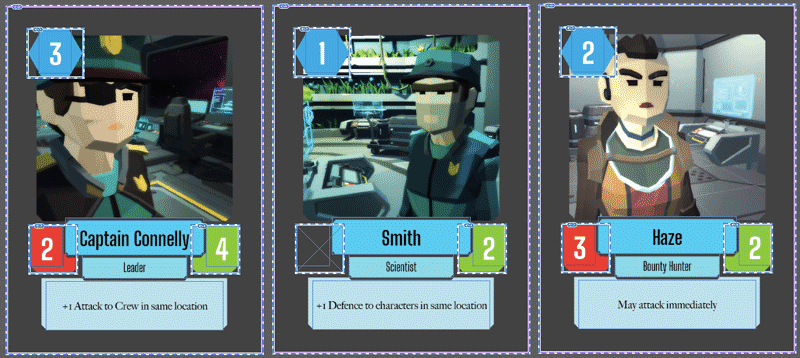
Notice how Smith doesn’t have an attack stat? That’s from back in step 3, where we left those two fields blank. You can build a lot of flexibility into the look of your cards by separating the visual elements into their own graphics; you can then control their visibility in the spreadsheet.
Making changes to the spreadsheet
If you make any changes to the spreadsheet — whether it’s changing one cell or adding whole new columns or rows — you need to export a new CSV, and overwrite the old one in your Links folder.
Switch to InDesign. in the Data Merge panel, click the menu button in the top-right corner and select Update Data Source.

Now InDesign will have the latest data from your CSV.
6. Create custom card backs
What about the backs of the cards? With everything I’ve covered already, you’ll see how easy it is to add card backs to all your cards — whether it’s the same back on every card, or custom backs for each one.
First you’ll need a graphic to put on the back of your cards. I’ve included one in the sample project called Card-Basic-Back.png.
Add a new column to the end of your spreadsheet and call it @Card Back, and paste Card-Basic-Back.png in the field for each of the cards.
Save your spreadsheet and export a new CSV to your Links folder.
Switch to InDesign and update the data source, as described at the end of the previous section.
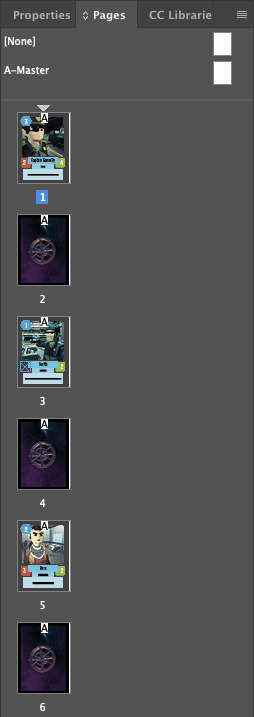
Adding card back for each card is cleverly simple. In the Pages panel, create a new blank page. Import the art asset for the card back, ensuring it is sized and positioned to fill the page.
With the artwork selected, go to the Data Merge panel and click the new Card Back item, at the bottom of the list. That’s it!
When you generate your card PDF, page 1 will be the front of the first card, page 2 will be the back of the first card, page 3 will be the front of the second card, and so on.
Let’s do that now!
7. Generate the cards and export as PDF
This stage is a two step process:
- Generate a merged InDesign document that has all of your cards on their own pages.
- Export the merged document as a PDF.
Generate a merged file
To generate the file with all of the cards, click the Create Merged Document button at the top-right of the Data Merge panel:
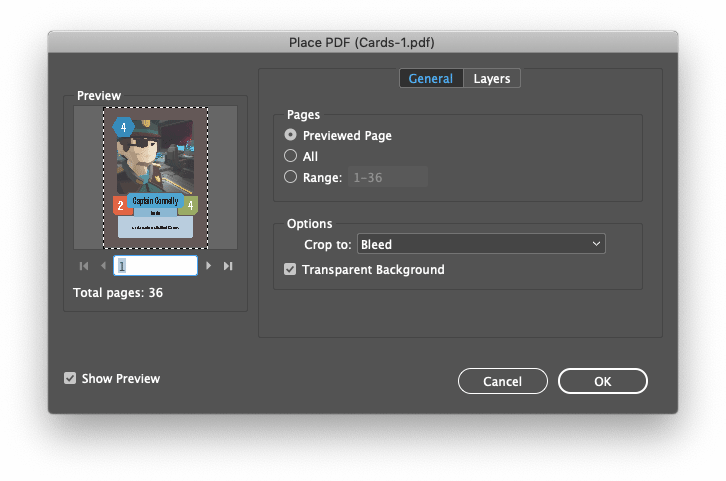
This opens a dialog box:
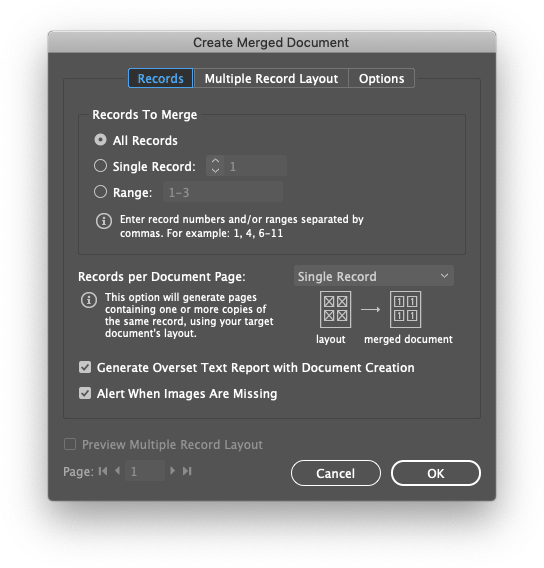
Leave all the settings at their defaults and click OK. InDesign may spin for a bit, depending on the size and complexity of your deck.
If you have any overset text — that is, text that’s too long for the text box you made for it — you will see a report showing you which objects need adjusting. You’ll need to either make the font smaller, the make text box bigger, or shorten the text in your spreadsheet for the overset items.
Important: What you’re looking at now is a completely separate and new InDesign document that was created when you did the data merge. Note the document title: Cards-1. Each card is on its own page. All template items have been converted into regular items, using the data from the spreadsheet.
Export as PDF
Select File > Adobe PDF Presets > [High Quality Print]…
Export your Cards-1.pdf file to the same folder as your InDesign document. After you choose your export location, you’ll see the big Export Adobe PDF dialog box. Don’t change anything, just click Export at the bottom right.
Note: When you’re finished exporting, the Cards-1 InDesign document should be closed and not saved. Any time you need to generate a new PDF, follow these steps:
- Open your Cards.indd document.
- Update the data source, to ensure you have the latest CSV.
- Generate a new merged document.
- Export the PDF from the merged document.
You’ve got cards!
If you are working with a publisher, check with them to see what format they want your cards in — there’s a chance this PDF is exactly what they require from you! Congrats, you’re “done”!
Export as PNG
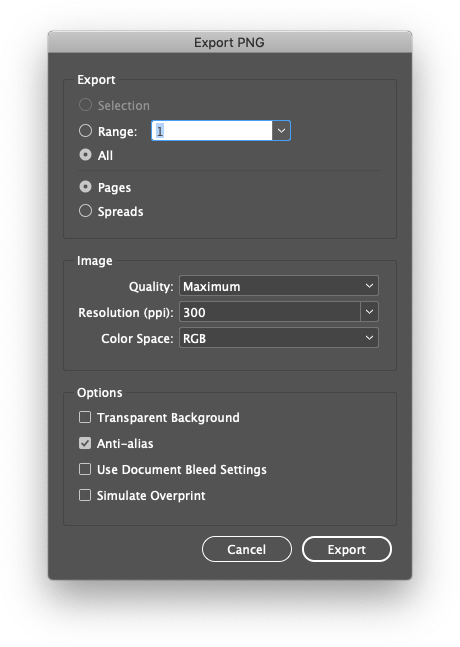
If you want to upload your cards to a print service like The Game Crafter, you’ll need to export your cards as PNG instead of PDF. Select File > Export. In the next dialog box, change the Format popup to PNG. In the dialog box after that, make sure the Resolution is set to 300, and Anti-alias is turned on.
Taking it further…
If you want to create a print-and-play document yourself to share with your friends and family, or post on a website like PNPArcade, read on. I’ll show you how to lay out your cards so that people can print them on their home printer… and if you’re really ambitious, how to import them as a digital deck in Tabletop Simulator.
8. Lay out the cards for print
The document you have now isn’t ideal for printing on a home printer. The sample project comes with some more template files that you can plug your Cards-1.pdf file into. The layout work is already done!
Note: I’ve gotten a few print-and-play games from Button Shy Games. I’ve appreciated the way they lay out their games the most — including the 8-panel rule sheet that folds down to 2.5″ x 3.5″ to match the cards themselves. The template I’ve provided matches their layout. Please check them out and buy their games!
The Cards-Print.indd Template
The included Cards-Print.indd is fully set up for an 18-card, double-sided deck. Open it to continue.
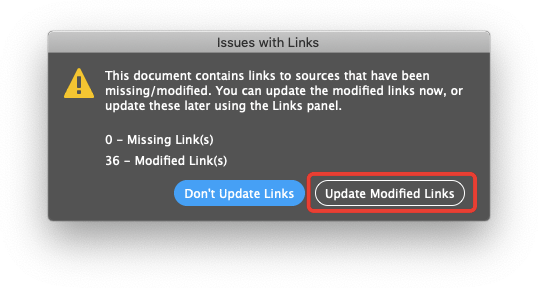
If you put your Cards-1.pdf into the same folder as this file, InDesign will tell you there are some missing/modified links. Click Update Modified Links. This tells the file to use your new Cards-1.pdf in all the places that reference it.
The first thing you will see is a blank instructions page; I’ll get to that in a minute. If you don’t need this page, feel free to delete it. If you plan to use it later, leave it in and exclude it from your PDF when you export it.
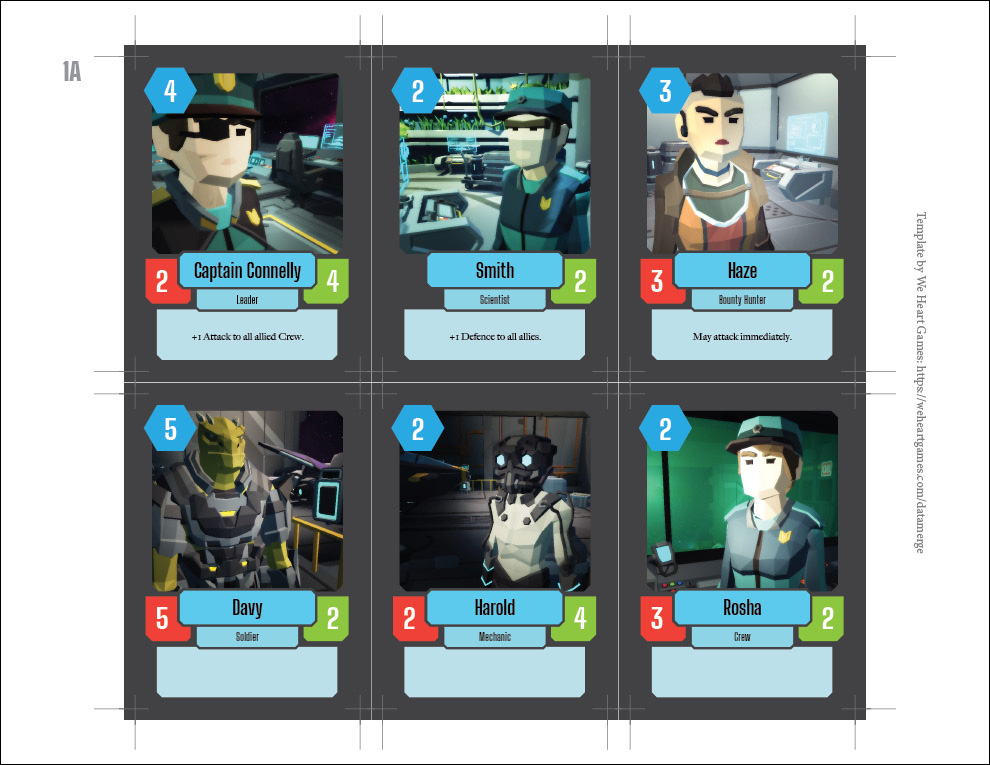
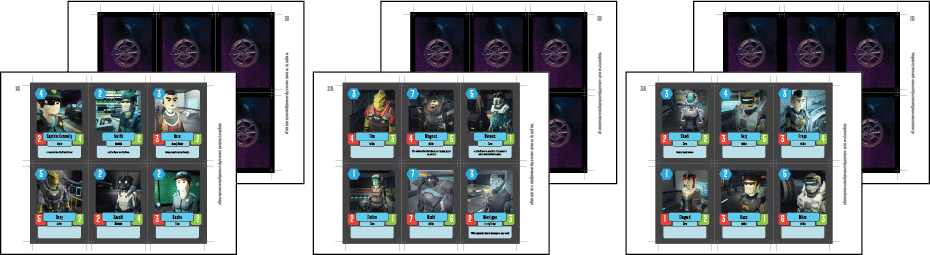
On the next few pages, your cards are laid out into a grid with six cards on each page, with crop marks already set up, as shown in the example image above. Alternating pages have the card backs for the previous page.
Here’s an example of how the cards are laid out:
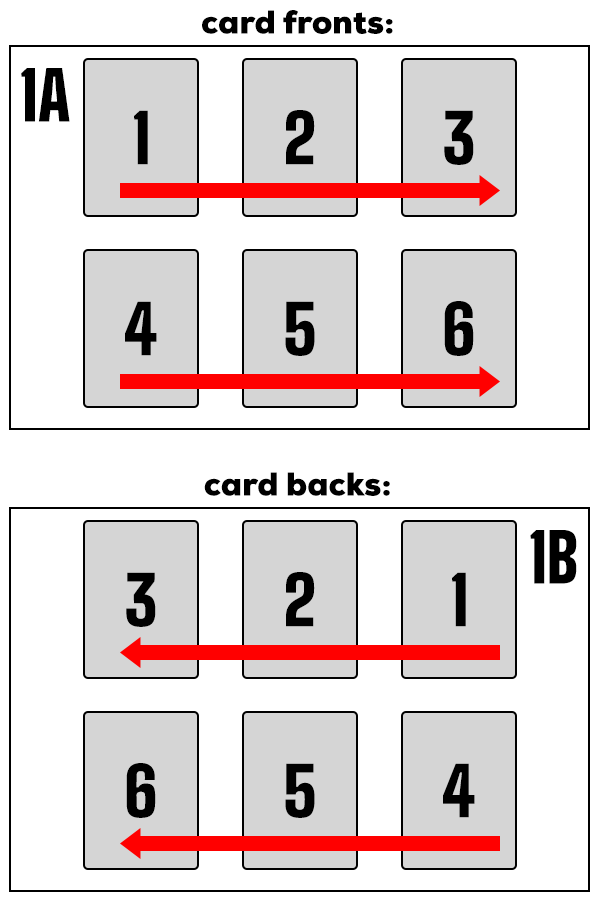
The pages for the backs of the cards are laid out in right-to-left order, so that when you flip the page to run it through the printer again, the correct card back is printed on each card.
Some tips for using Cards-Print.indd:
- Check out the Layers panel. Feel free to turn layers on and off as you see fit! There are separate layers for:
- crop marks
- internal crop marks (some people like them, some people don’t)
- card numbers
- instructions
- the cards themselves
- page numbers
- guides
- Have a look at the Pages panel to see the Master Pages that are used in the document. This is where you’d go to remove the url for this blog post, that shows up on the right side of the card pages.
- If you don’t need card backs, you can delete those pages without affecting anything else.
- If you have more cards in your deck, you will need to duplicate the last two pages, then re-link each card. To relink a card:
- With the Selection tool, click on the card, then select File > Place…
- This opens the file dialog. at the bottom, look for the Show Import Options checkbox and make sure it’s selected. Choose your Cards-1.pdf and click Open.
- You’ll see a dialog box that lets you choose which page of the PDF you want to insert. If you don’t get this dialog box, that means you didn’t select the Show Import Options checkbox in the previous window.
- Choose the card you want to import on the left side, then click OK. You’ll need to do this for each card.
Setting up your Instructions
Part of the instructions in this file are shown upside-down, so I made a separate file for them, to make it easier to lay them out — no need to work upside down! Open Instructions.indd:
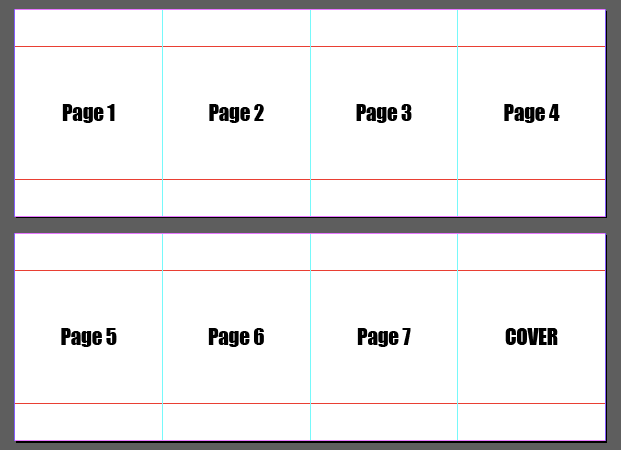
The guides show where the page gets folded, and each panel is labelled. Open the Layers panel, and you can toggle the Page Labels (hide me) layer. Lay out your rulebook and export a PDF called Instructions.pdf into the project folder.
Now you can open Cards-Print.indd, update the links, and your instructions will automatically be laid out in the right place.
Note: This is admittedly a pretty small space to squeeze an entire rulebook into. If your game needs more room for rules, delete the instructions page and lay it out separately on a standard 8.5″ x 11″ page.
Export as PDF
Select File > Adobe PDF Presets > [High Quality Print]…
Choose a location for your Cards-Print.pdf file. Again, you’ll see the big Export Adobe PDF dialog box. Don’t change anything, just click Export at the bottom right.
Now you have a print-ready file that you can send to others! Congratulations!
9. Lay out the cards for Tabletop Simulator
If you’re looking for a way to playtest your game digitally, Tabletop Simulator is an excellent choice. I’m not going to cover how to use it in this tutorial, but I will show you how to export your cards to a custom Tabletop Simulator deck.
Open Cards-TTS.indd. Update modified links, if prompted. Your cards should show up like this:
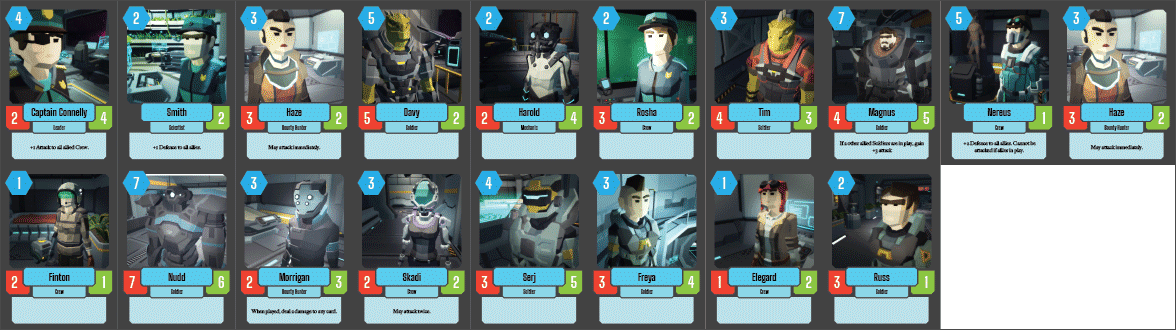
In Tabletop Simulator, cards need to be formatted without bleed, on a single image, and not more than 10 rows wide and 7 rows tall. If you need more cards, you can duplicate the cards that are in this file and relink them, as described in the previous section.
Note: I’ve included the card backs on page 2 of Cards-TTS.indd. If you don’t need backs or you only have one card back for the entire deck, you can delete this page. Tabletop Simulator allows you to upload a single image to use for all the backs of a deck. The following instructions will assume that you are using custom backs for your cards.
Export as JPG
Select File > Export… and make sure the Format popup at the bottom is set to JPG.
Make sure the Resolution is set to 300 and Anti-alias is turned on:

Adding your deck to Tabletop Simulator
Open Tabletop Simulator. Open your game if you already have one, or create a new, empty “Single Player” game (it doesn’t matter at this point if your game is multiplayer or not).
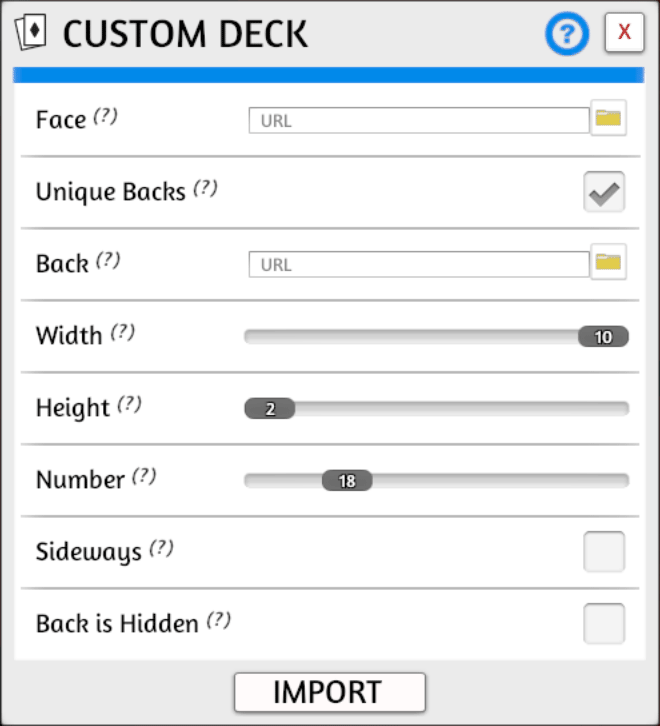
From the toolbar at the top, select Objects > Components. In the Components window, select Cards, then Custom Deck.
- Paste the URL for your card fronts into the Face field.
- Select the Unique Backs checkbox if your cards have custom backs.
- Paste the URL for your card backs into the Back field.
- Set the Width and Height fields to the number of cards in your uploaded artwork. Using my 18-card sample, you’d set the width to 10 and the height to 2.
- The Number field is for the number of cards in your deck. Set it to 18.
- Click the Import button to add your deck.
Some additional tips
- You can easily host your art files on Dropbox, but you must change the end of the URL from “dl=0” to “dl=1“.
- To make sure you always have the latest version of your graphics, go to Menu > Configuration > Game and turn Mod Caching off. This will force Tabletop Simulator to re-download your art files every time you open your game.
Further reading
There have been many posts about creating card games as custom Tabletop Simulator mods. I recommend these ones:
- Video tutorials on the basics of Tabletop Simulator
- Creating a Tabletop Simulator Mod
- How to make a Tabletop Simulator demo of your board game (this specifically covers creating a deck of cards)
I hope this tutorial and its accompanying template files were useful to you! If you do use them to make something, I’d love to hear about it! Find me on Twitter, or join the conversation on the BGG Forums.
Take care!
-Mike Berg