While designing In Dreams, the cards have evolved significantly since our first prototype; here’s the journey we took to arrive at the design we finally landed on.
All art by WOMBO Dream, used with permission.
The In Dreams crowd sale is coming soon; sign up here to be notified.
Version 1
The first mockup I ever made had 6 numbered variants on it, laid out in a table below the main prompt. On the back: just the location and a number from 1 to 6.
The draw pile would sit with the location side face-up. To generate an encounter, you’d look at the number on the top card of the deck to determine how many prompt cards you’d draw for this encounter. You’d flip a card for a prompt, then look at the number on the next card on the draw pile — this indicates the numbered variant for the card you just flipped. This way you’d get a random variant for each card.
Problem 1: After you flipped the second card, you didn’t have an easy way to tell at a glance what your first variant was, so you’d have to write each one down as you went — or peek at the other side of the card next to it.
Problem 2: Each location had a fixed number of prompts that would always occur at that location. That didn’t line up with the kind of variability we wanted.
Problem 3: Six prompts for a single encounter felt like a lot for a player to manage; at that point it was just information overload.
Aside: the first working title for the game was “Dreamscapes”.
Version 2
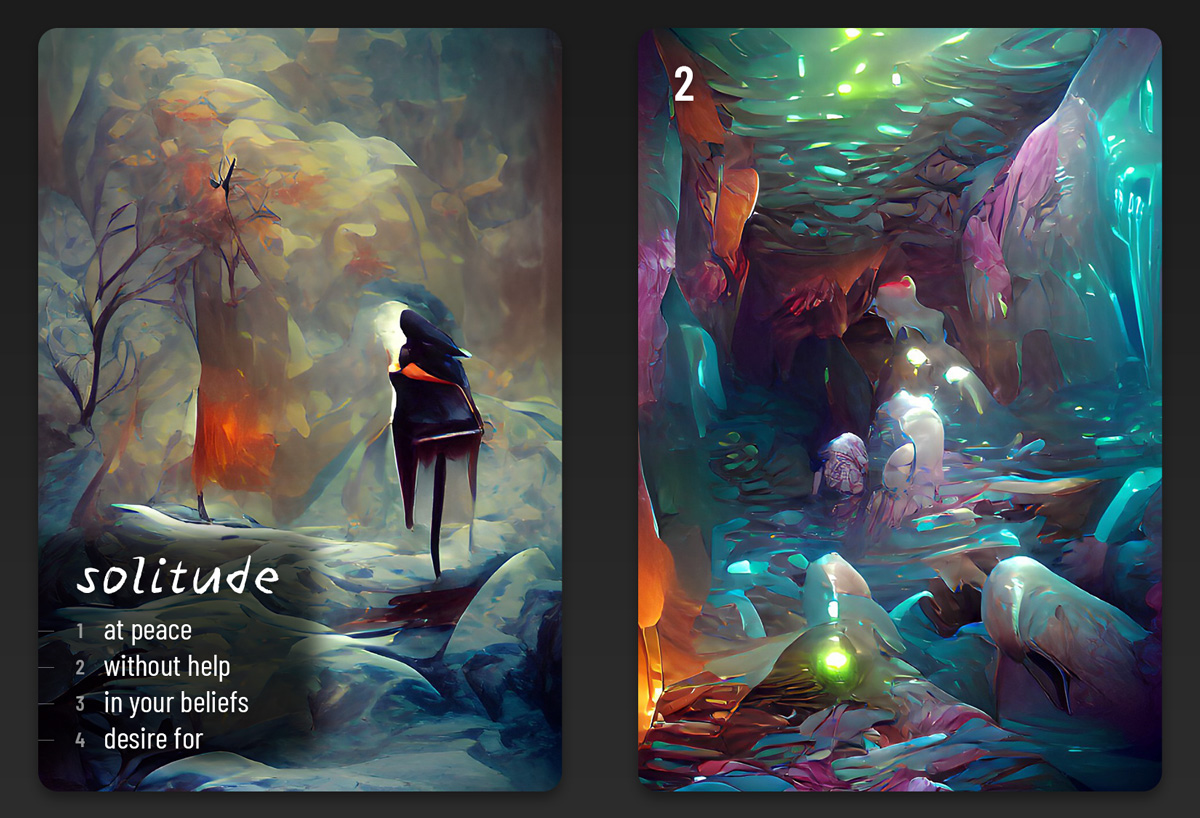
While we liked the idea of more possible variation on each card, six prompt cards in one encounter didn’t feel right. We brought the variants down to 4, and I lined them all up on the left edge of the card.
This is when I had the seed of a breakthrough — even though it won’t look like it at first.
My next idea was to make a printable play sheet with spaces for each card along the top, and a solid line running through all of them. The rules would go on the rest of the page, with space for players to make notes about their character and their progress, if desired.
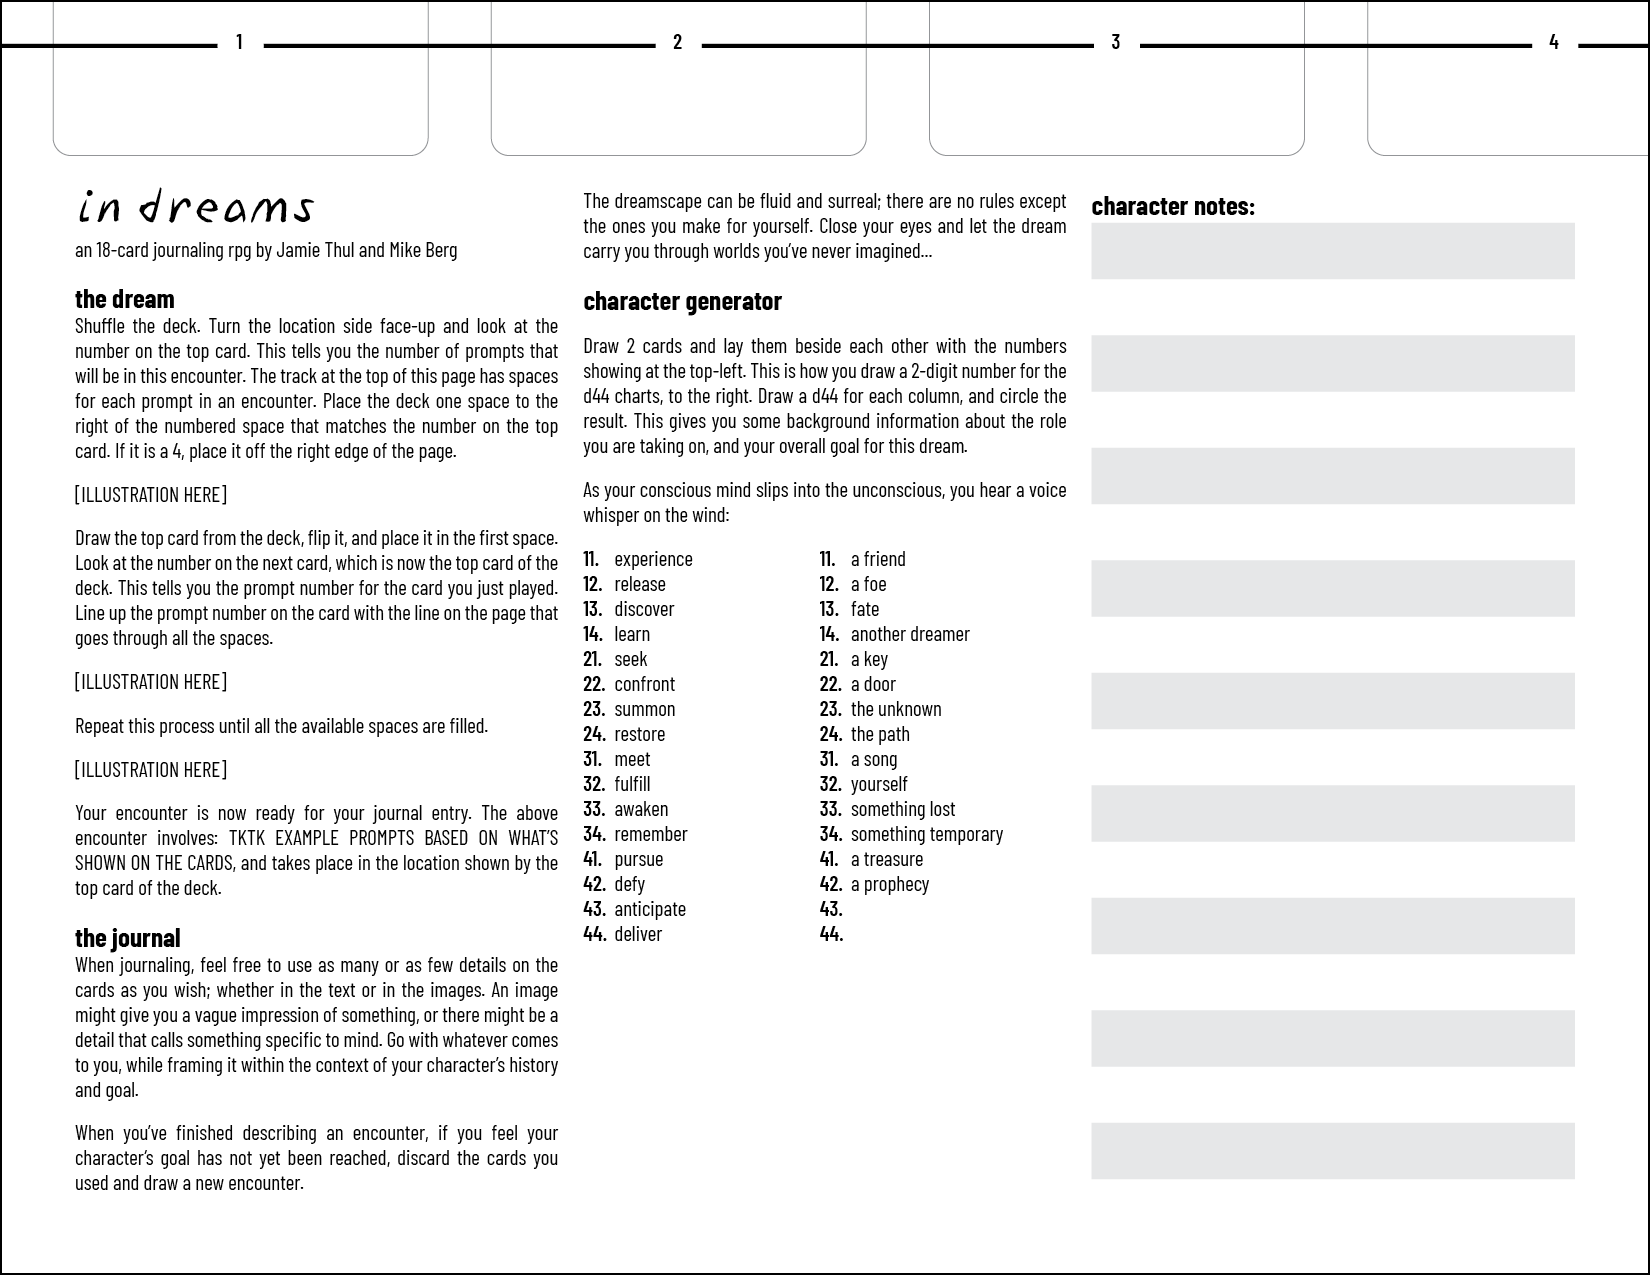
The idea being that you would place your cards so that the chosen variant would lay across the line, so that you could easily see which variant had been selected for each card. Here the first card is using variant #3, and the second card is using variant #1:
Problem: Technically, players could use any line on a table or piece of paper, but now we felt we needed to include a printable PDF with the game. Our goal was to have the game be completely self-contained in a deck of cards. Back to the drawing board!
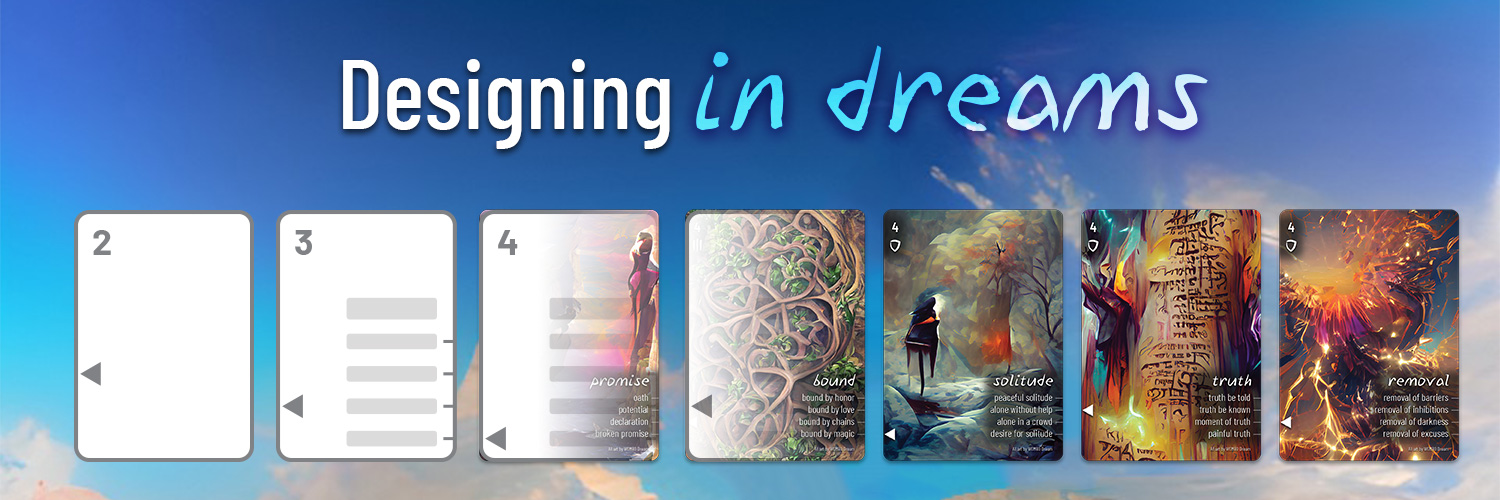
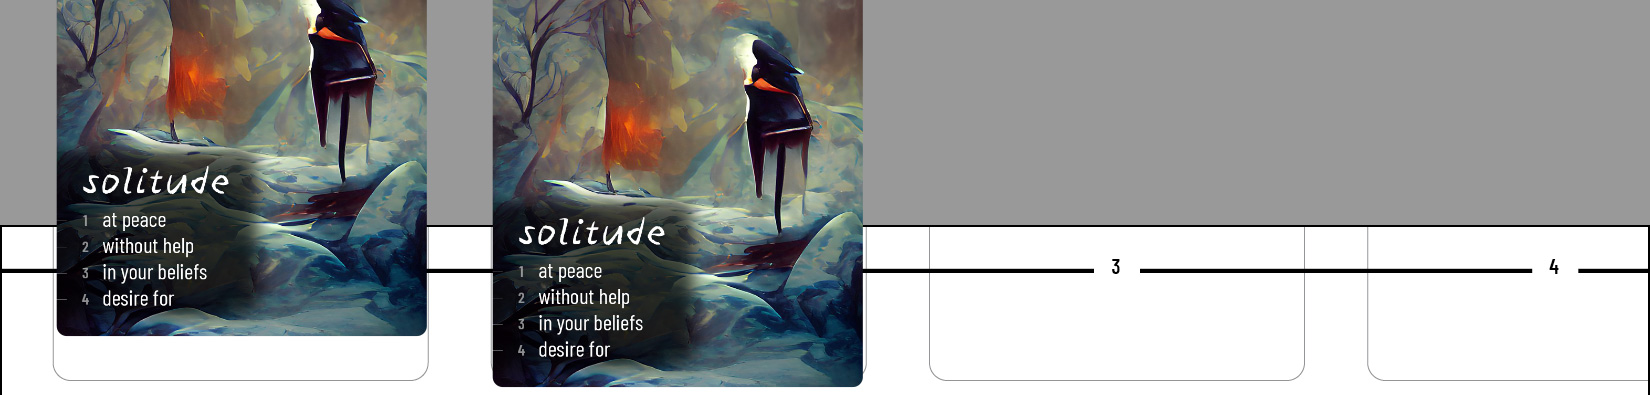
Version 3
The line on the paper was a good starting point, but we needed a way to do it without any other components. This is when our wonderful little arrow arrived:
I moved the variants to the right edge of the card, and added an arrow to the left side of the card. I also added the number to the front of the card. Now you could position your second card so that the arrow pointed at the variant indicated by its number!
We had a variant selected for each prompt simply by positioning a card next to it, and the entire encounter was readable just by looking at it; no need to write down each prompt. This felt like a Very Big Moment… but we weren’t quite finished yet.
Problem 1: It still felt a little bit finicky. If your cards got jostled at all, it would be easy to lose track of which variant was which.
Problem 2: We started to feel like drawing an encounter with just one prompt card was not giving the player enough to work with. It also isn’t enhanced by the wonderful way our prompts chain together; we feel that this ‘chaining and combining of concepts’ is a big part of what makes In Dreams special.
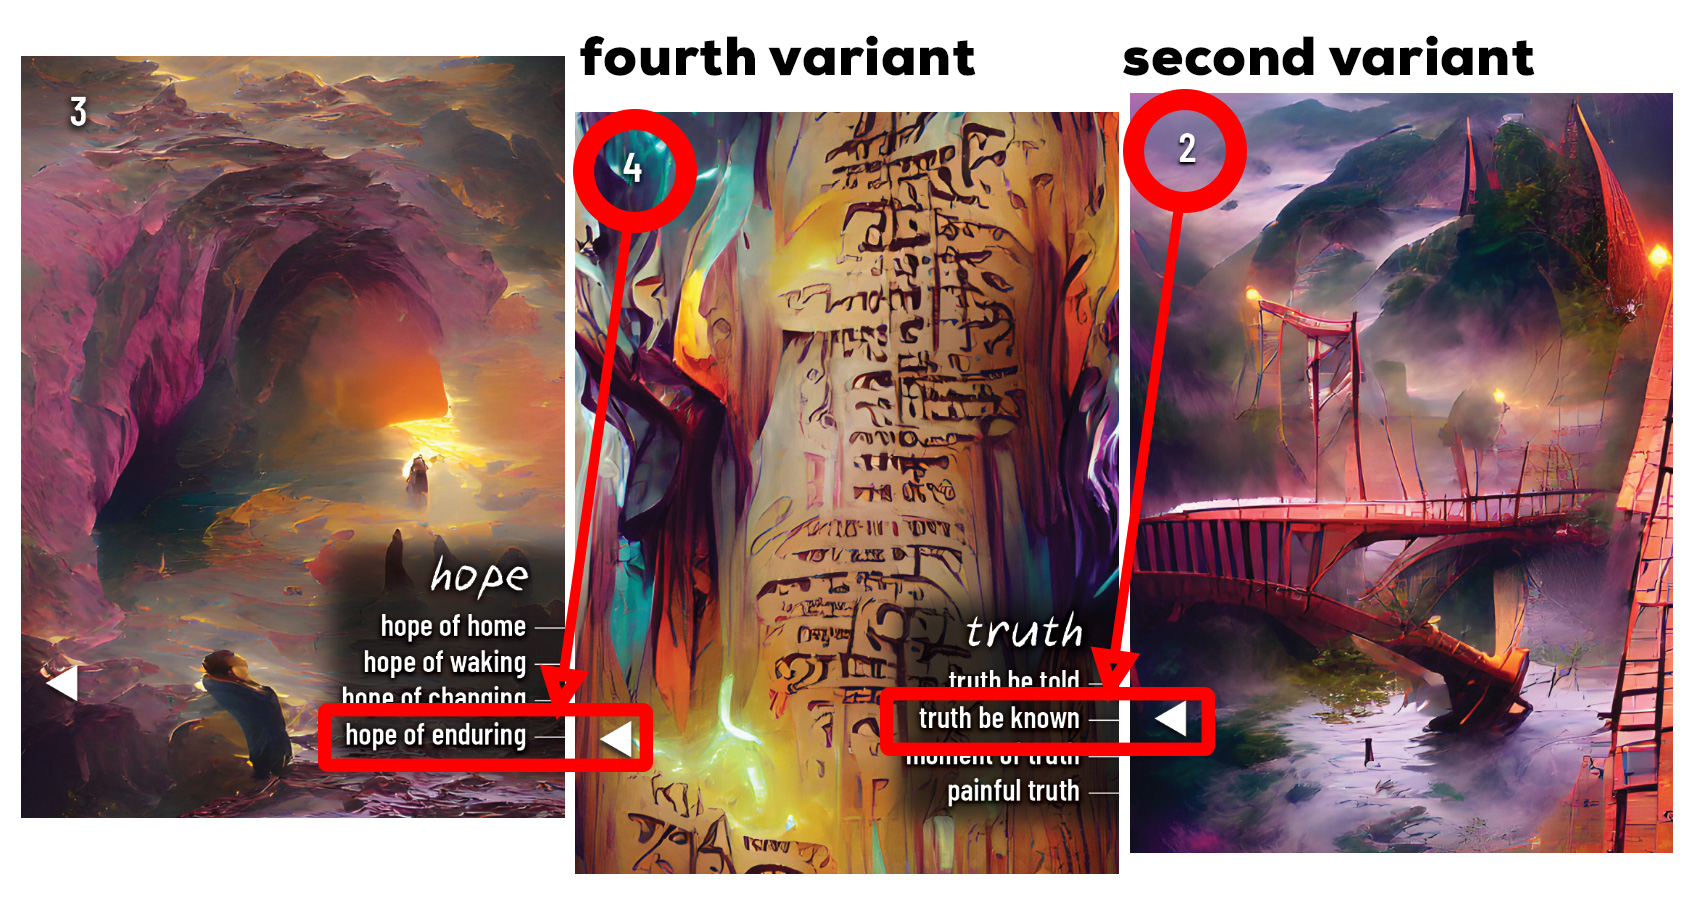
Version 4
I was able to “feed two birds with one scone” when it suddenly hit me that the arrow did not need to stay in the same position on every card…! It seems so obvious in hindsight.
This solved the first problem from version 3 by making it very obvious how the cards should be lined up… just make sure their bottom or top edges are all lined up! The arrows will all point at their selected variant.
It solved the second problem by completely disconnecting the arrow from the number on the card. The position of the arrow has nothing to do with the number, so we could remove the number 1 from all cards and strictly have a range of 2-4… and we could still keep all four variants.
At last, this design simply felt right.
Events
With the card design basically locked in, we started exploring ways to spice things up a bit… something to add some unexpected extra flavour to an encounter. This came in the form of an entirely new mechanic: Events.
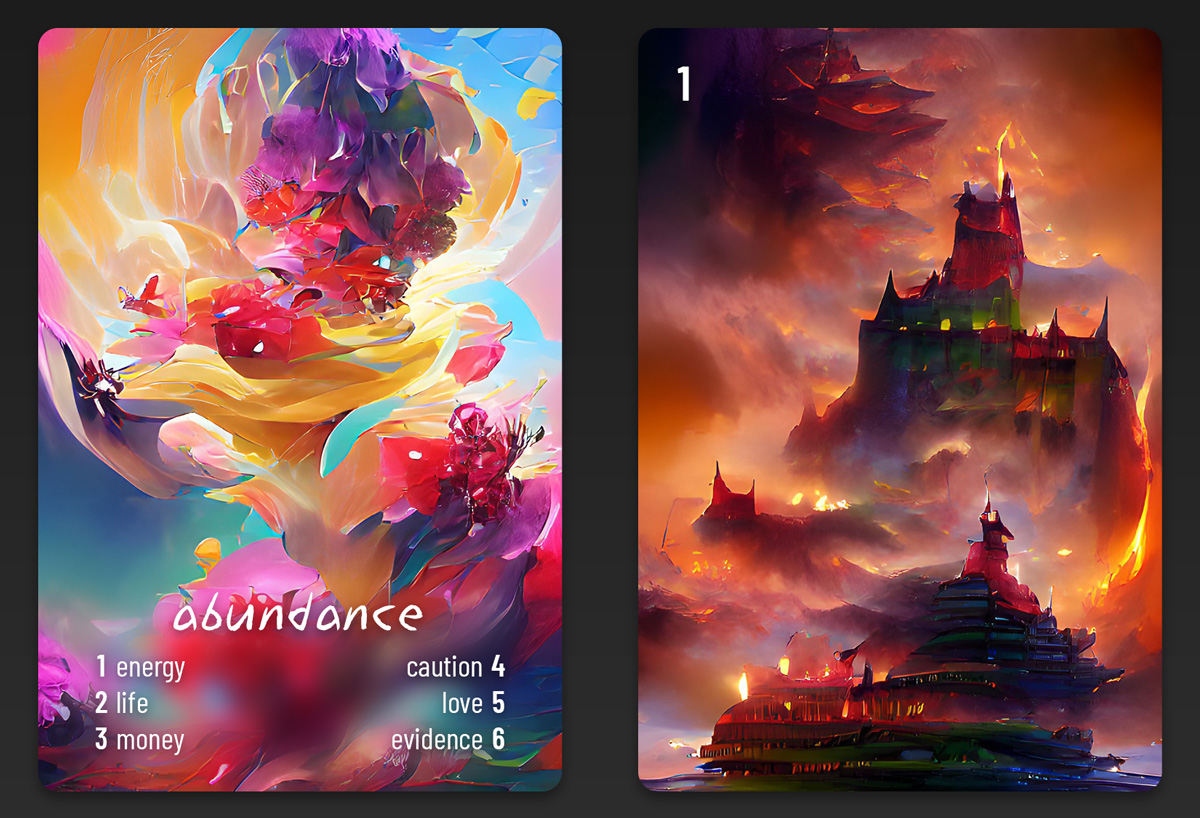
We decided to add “suits” to each card, which would give us a way to hook new mechanics into the cards:

We assigned each of the suits meaning — something that could potentially be applied to an event:
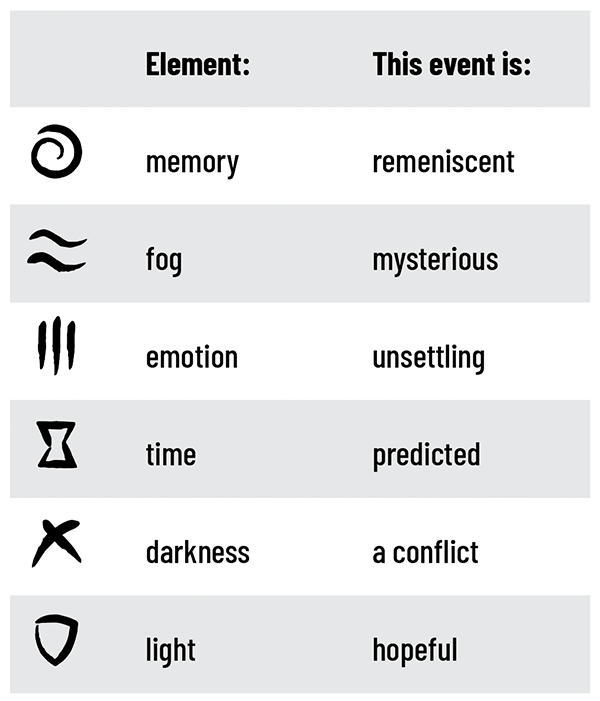
While we ended up removing this from the game, we have plans for using the suits in different ways in the future, and we look forward to all the ways players will interpret and integrate the suits in their own add-ons for the game. For now, we wanted to keep everything “in the cards” as much as possible, to remove the need to disengage from the game and look up a table in a rulebook.
With suits on the cards, we could use them to trigger an event with the following rule:
If any two adjacent cards have the same suit, draw an event from the event deck.
Creating the event deck
We explored the possibility of having event tables in the rulebook; drawing cards and using their numbers to look up an event. Again, this didn’t feel right because it took players out of the game. We decided to make a whole new deck of cards to handle events.
We really wanted to continue to use the mechanism of chaining cards to create a unique combination, so I pulled together the first mockup for a possible event deck:
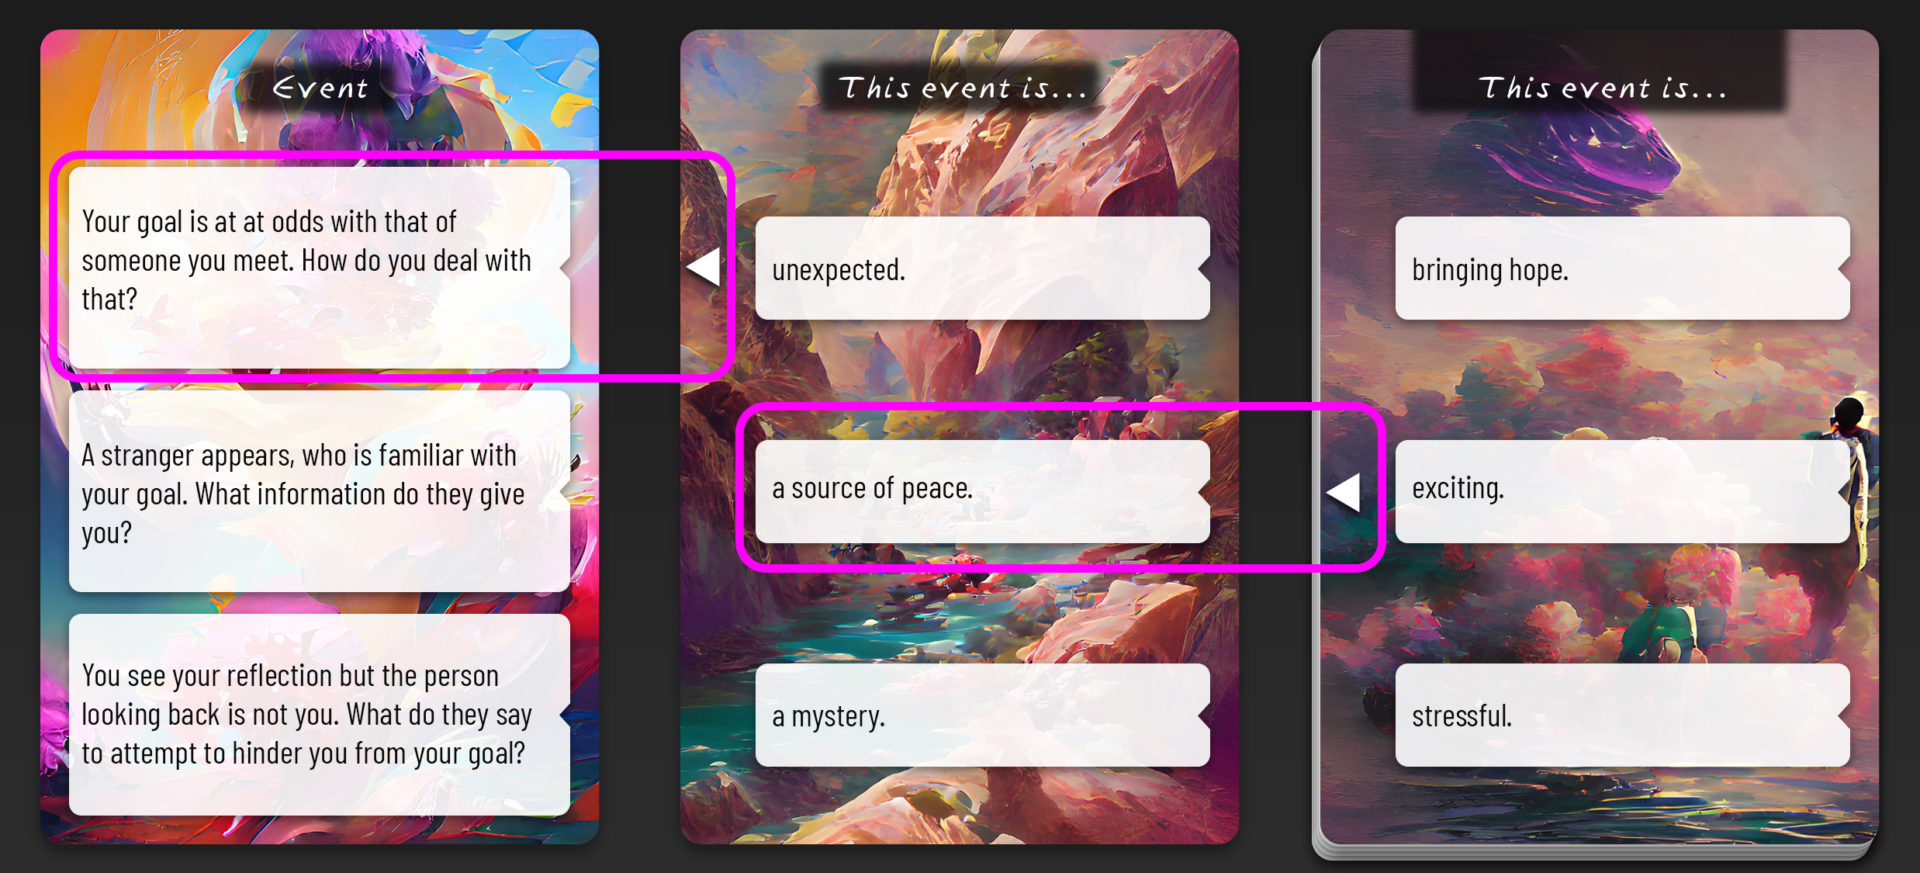
The deck is on the right; you’d draw a card, flip it, and place it on the left. Then you’d draw another card and just slide it over into the space between the main Event card and the deck. Now you’ve got a chain where one of three events from the leftmost card is chosen by the middle card’s arrow. The middle card has three options for the “tone” of the event, and one of those is chosen by the arrow on the top card of the event deck.
I didn’t love this design; there was just too much visible at once for my liking, and 95% of the card on the right is irrelevant. I started to wonder if we were going to need a separate box that could hold the event deck; a box that was only big enough to show the left side of the cards:
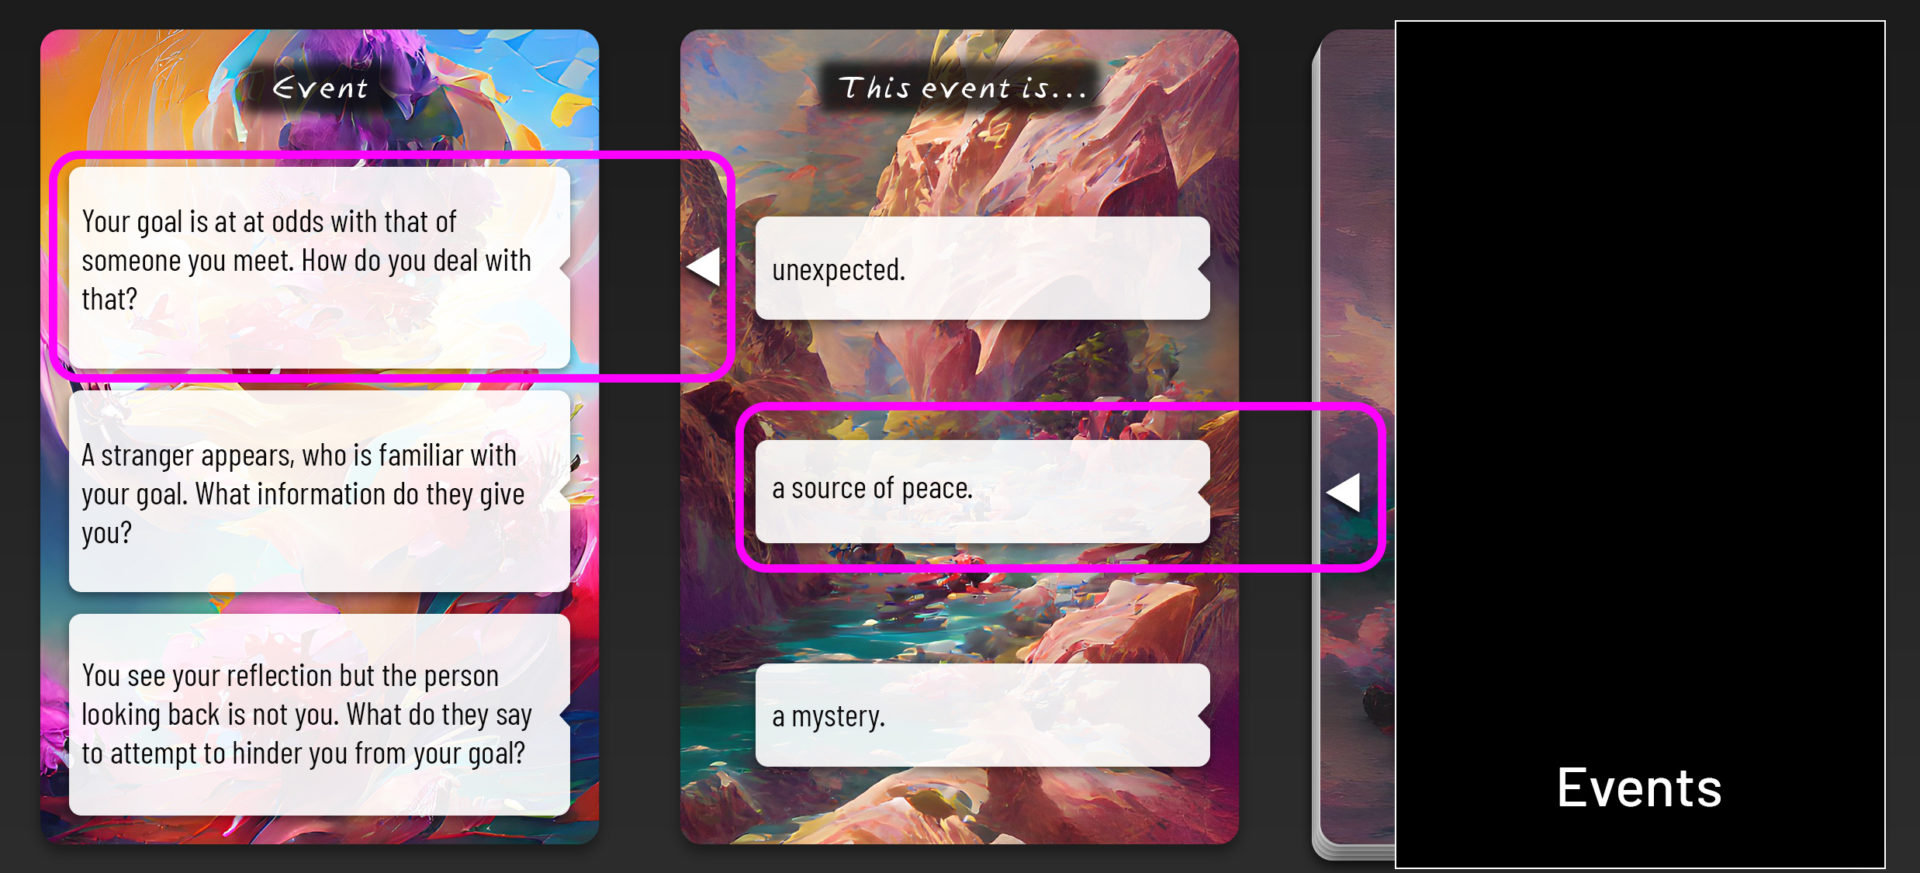
I really didn’t want to add another component to the manufacturing process, and give players something else to lose — or get smushed, as those kinds of boxes tend to do!
I knew I had to find a better way.
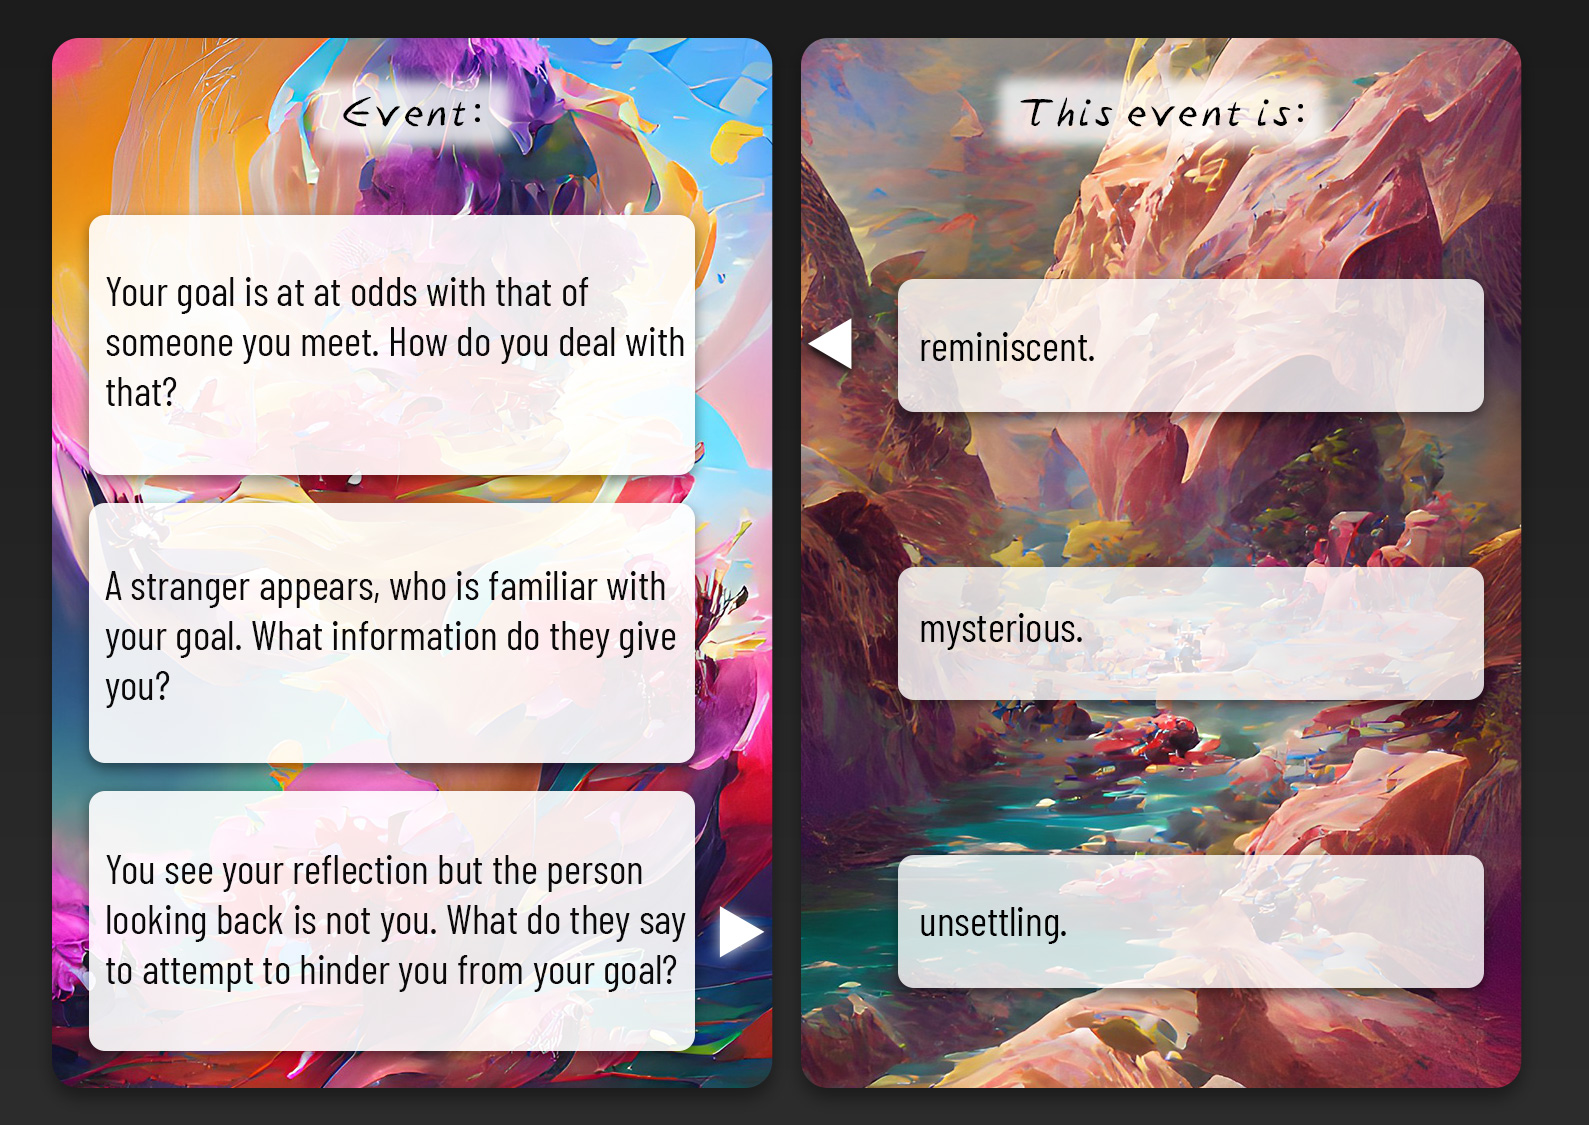
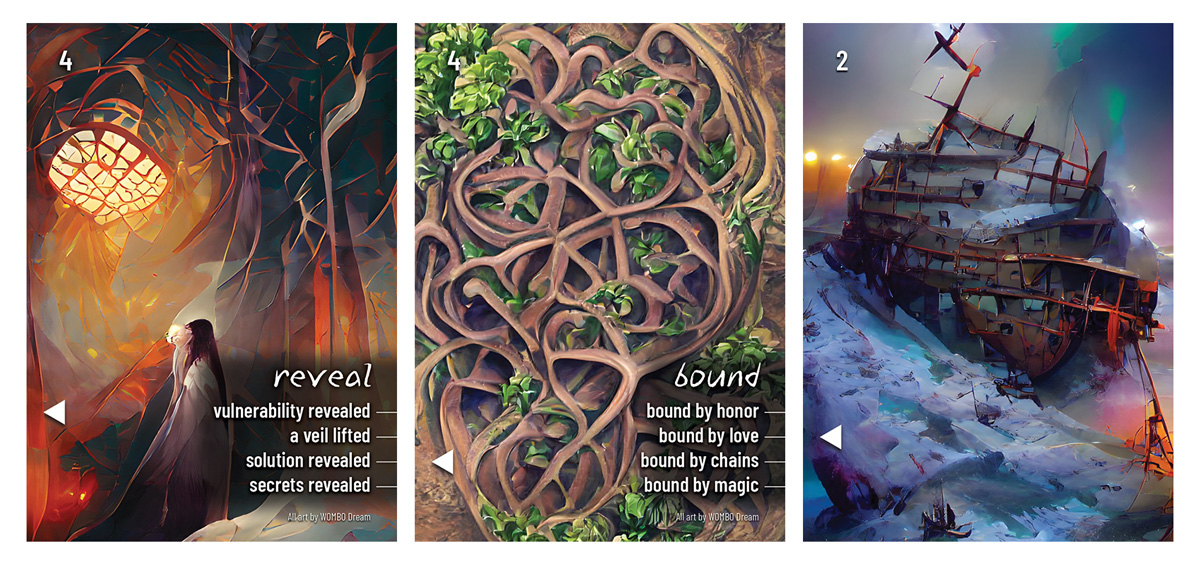
Now we’re getting somewhere! Each card points at one of the three options on the other card. There are three unique events on all 18 event cards, and six different “tones” distributed evenly between the three positions — it is a truly random tone assigned to each event.
Aside: 54 events and 6 tones combine to create 324 unique events in a deck of just 18 cards.
I still wasn’t quite satisfied with the design, though. I wanted the arrows to be more obviously tied to the boxes on the opposite card…
It just needed one more change:
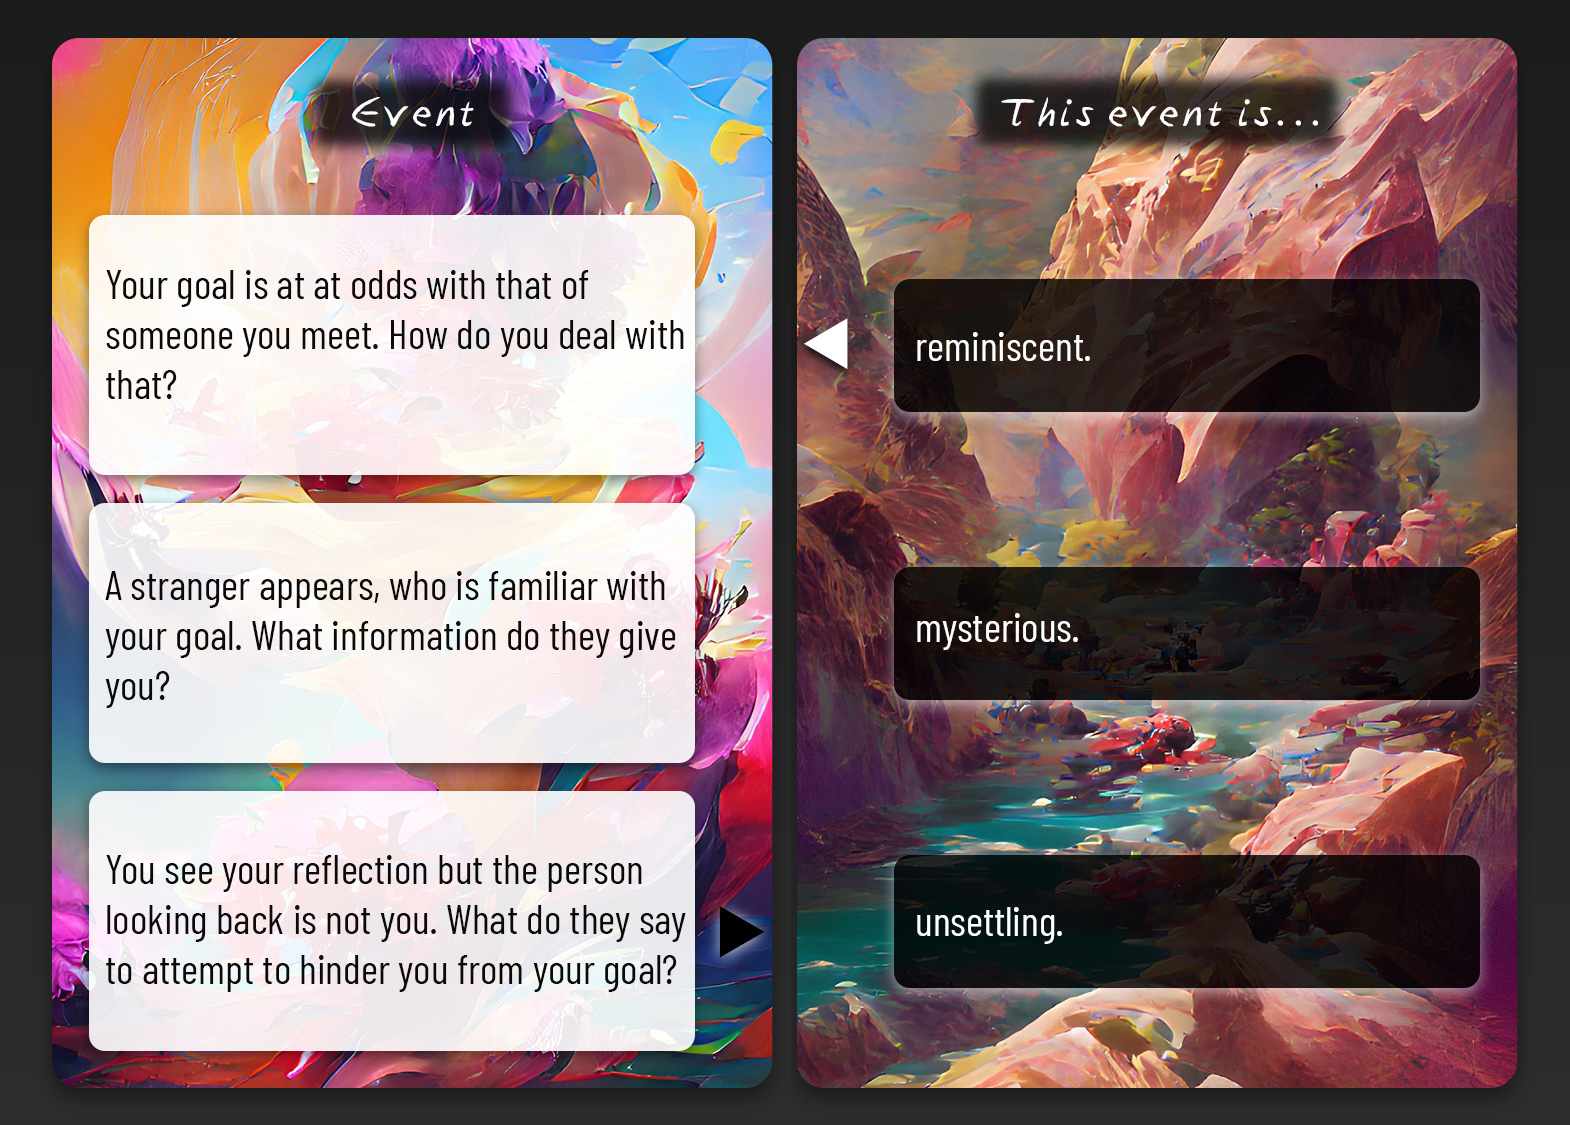
With a black arrow for the black boxes and a white arrow for the white boxes, there is a much clearer visual connection.
Thanks!
Thanks for sticking with me! I hope it was helpful, even if only as a demonstration that a “simple” design takes a great deal of time and care to get it to a point where it seems like it couldn’t have been made any other way.
-Mike
We don’t have comments, but feel free to start a conversation with me on Twitter or Discord.