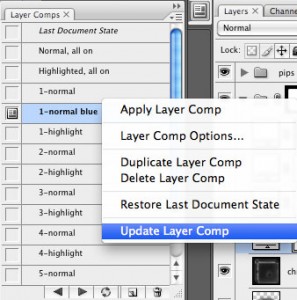
Do you save out multiple variations of a graphic by setting layer visibility? Ever wish there was a faster way to do that whenever that graphic needed to be updated?
This video shows you how to use Layer Comps to save layer visibility settings so can easily switch between visibility “states” for multiple layers (and even layer styles) at once. This saves you from having a separate document or layer group for each instance of your graphic, and makes your source PSD’s easier to update.
- Create broad layer comps to set overall visibility settings for multiple layers at once.
- Fine-tune your layer comps so that you have a comp for every instance of the graphic you are editing.
- Learn how adding and deleting layers affects layer comps.
Addendum:
I realized after recording that I sort of left you hanging with an alternate art style (the blue version) and didn’t really give a way to manage that. Here’s how:
- Right-click on the “1” layer comp and duplicate it:

- Rename the layer comp to “1-normal blue”.
- Change the visibility settings so that your blue layer is turned on.
- Right-click on the layer comp again and select “Update Layer Comp” and you’re done:

Download the finished Photoshop file that was created in this screencast.